Only parameters that are connected to the Group Input are available. If you add more parameters to the group input, you can click on the Reimport Parameters button on the toolbar of the asset editor to refresh the parameter list.
Adding more parameters will not automatically update actors placed on the map, this prevents from you accidentally changing models that were final, you can manually refresh a placed actor by changing a paremeter or clicking the refresh button on the details panel.
Param settings
Node panels, parameter tooltips, Min/Max values are supported.
You must assign unique names to Node panels, otherwise they will be combined into a single panel.
Vector Param
Vector Params have a special toggle called Convert Space, this toggle will mirror and swap the X and Y axis, converting from Left Handed coordinate system to Right Handed coordinate system.
This is disabled by default, and can be turned on when you need that the Front/Right of unreal is the same as the Front/Right of blender, generally for “Position” or “Direction” kind of parameters.
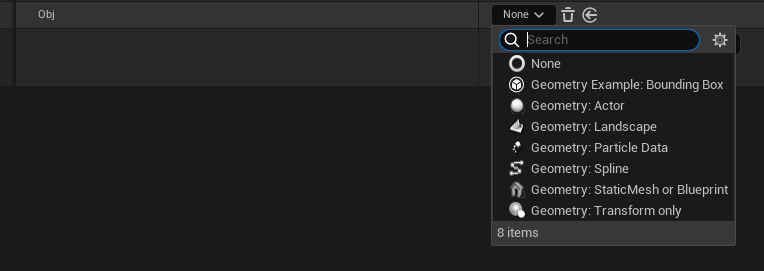
Geometry Params
Geometry params are a special kind of socket, they allow for multiple stuff to be selected in blender, such as geometry, curves, points, etc.
When you expose a pin of this type, in Unreal you will be able to select which kind of geometry you want to export, for example a Spline or a Static Mesh asset.